 Format Styles is a more intelligent execution of formatting. Found in the Home tab, this commonly ignored feature of MS Word automates formatting of headers. To use it, highlight the header/s (either one by one or use Ctrl key to highlight several titles,) then choose as Heading 1. All headers of the same level (outline) should be formatted as Heading 1. (The number 1 refers to outline level, not ‘first header’ or ‘second header.’) 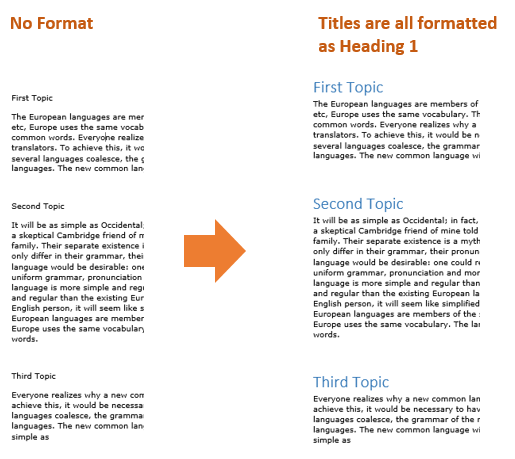 Once all headers are highlighted or “tagged” as Heading 1, users can change its format in the Home tab by right clicking on the Heading 1 icon > Modify. 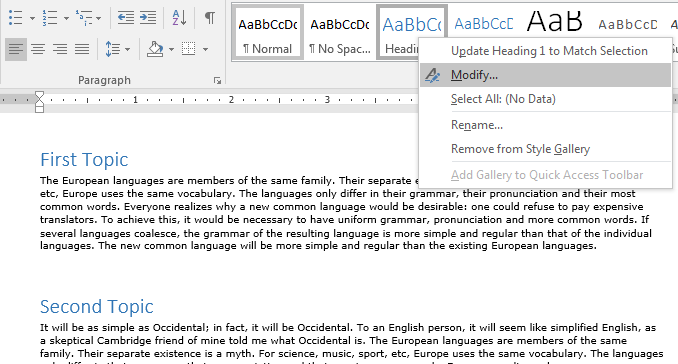 From here, change the format of Heading 1 style. More options are found in the Format button on the bottom left part. Once done, click OK and all texts/titles formatted as Heading 1 will update format. 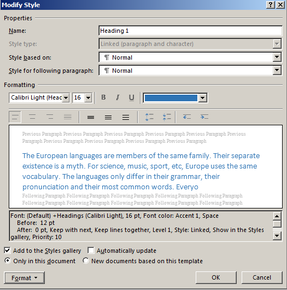 Note that second level titles may be formatted as Heading 2 or Heading 3.  Mail Merge is a feature of MS Word used to automate creation of documents, with changes in a few portions of it. It requires a database or at least a spreadsheet where it will get the details of the document (like a letter or envelope.) Mail Merge starts with the database or spreadsheet. It must have the fields needed to make the letters.  1. Prepare the letter or document, leaving a space for parts that will be filled out by Excel data.  2. Click Select Recipients then choose Use an Existing List. Search for the MS Excel or MS Access file. Note that users also have the option to type the list here by choosing Type a New List. 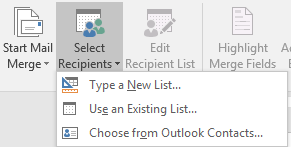 3. In the popup, select the Sheet where the list is found. Then click OK. This would activate the other Mail Merge buttons: 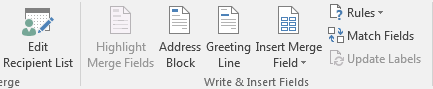 Mail Merge can offer creation of Address Blocks or Greeting Line (Dear firstname lastname) but this can also be done manually using the Insert Merge Field option. 4. Edit the document by adding Merge Fields (or adding Greeting Lines or Address Blocks.) 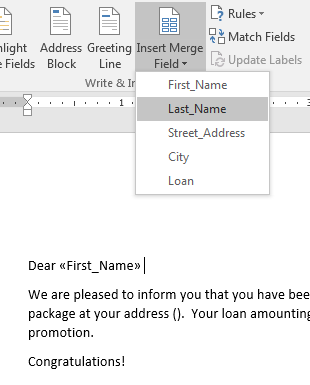 5. Complete all Merge fields.  6. You can click the Preview Results to see each letter. The Word document will update as you navigate the left and right buttons. 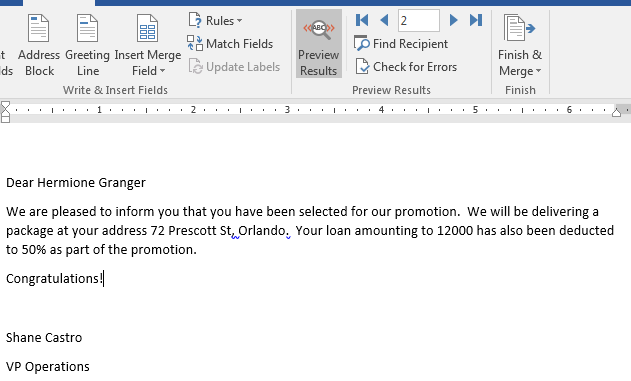 7. The Finish & Merge will now give options to either Edit Individual Pages which will create several pages in that same document, each page shows a different entry from the spreadsheet or database, or Print. 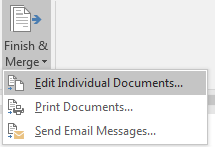 Page Breaks and Section Breaks
It is the most common break and is found in two places in the tab: Insert > Pages > Page Break Layout > Page Setup > Breaks > Page 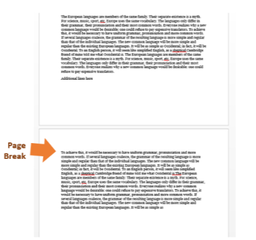 2. Column breaks work the same as page breaks, but only on documents set with multiple column per page. Column breaks become page breaks when the format has been reduced to a single column. 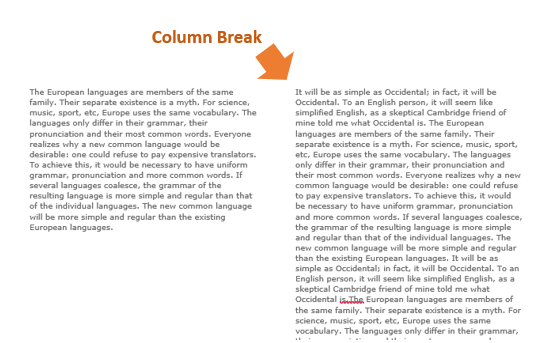 3. Section breaks are similar with Page Breaks, but section breaks produce new sections, visible in the navigation pane. Sections can also start new page numbering (for example, you can have documents divided into two sections—the first sections will use page number format I, II, III, IV, while the second section will use 1, 2, 3, 4, 5.) There is also an option for a Continuous section break which does not produce a new page but produces a new section. 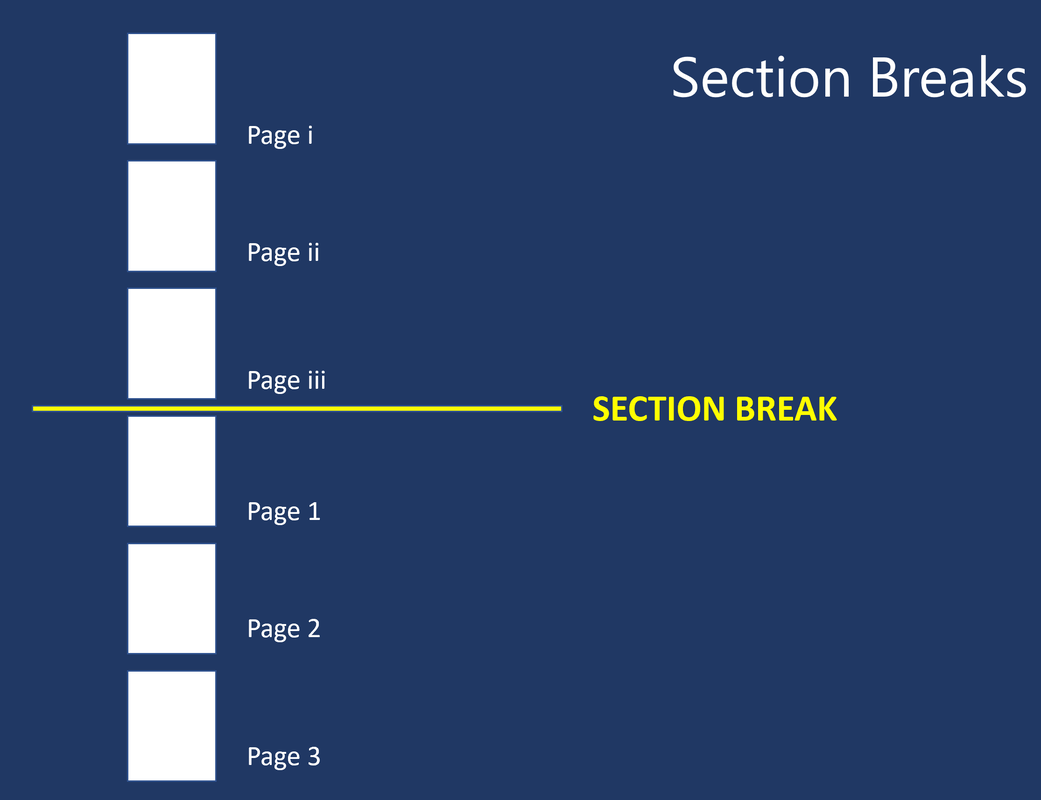 |

Archives
April 2020
Categories |
Menu

 RSS Feed